Pod to Pod Communication with Podman
Podman is becoming a considerable option for deploying containers in a small scale. In my case, as Fedora 32 isn't able to run Docker CE and the guide I was using to get that running didn't work, I had to learn how to stick with this alternative, and honestly, it is similar to Docker, so the learning process wasn't complicated. Also, you don't need root access to perform most of the simple tasks (contrary to Docker).
One cool thing from it is that you are able to set up pods and run containers inside them. Everything inside the pod will be isolated on its own network, and you are also able to open ports to the outside by mapping them to a host port. Generally, you will find lots of guides on how to install a stack on a single pod, but I wanted to go further and see how I perform any kind of communication between pods.
Let's say I want to create a pod for backend stuff (like a database) and another pod for frontend stuff (like an application). We can create a pod for backend containers and set up another pod for frontend containers, where we are going to map a port to the outside.
This example is based on this article. There is a lot of useful information here that you can check. Time to start!
Steps
Remember to run everything as superuser. To generate our network, we need to run the following command:
> podman network create foobar
We can see the generated network here:
> podman network ls
NAME    VERSION  PLUGINS
podman  0.4.0    bridge,portmap,firewall,tuning
foobar  0.4.0    bridge,portmap,firewall,dnsname
Now, let's generate the pods. As WordPress uses port 80 to show the application, we are going to map it to port 8080 for testing purposes. So, we do this:
> podman pod create --name pod_db --network foobar
> podman pod create --name pod_app --network foobar -p "8080:80"
> podman pod ls
POD ID        NAME     STATUS   CREATED         # OF CONTAINERS  INFRA ID
fe915374e2cd  pod_app  Created  9 seconds ago   1                6bd416faab89
ef0b632e857d  pod_db   Created  14 seconds ago  1                0b6fabe122b6
Finally, let's create the containers for each pod:
> podman run \
  -d --restart=always --pod=pod_db \
  -e MYSQL_ROOT_PASSWORD="myrootpass" \
  -e MYSQL_DATABASE="wp" \
  -e MYSQL_USER="wordpress" \
  -e MYSQL_PASSWORD="w0rdpr3ss" \
  --name=mariadb mariadb
> podman run \
  -d --restart=always --pod=pod_app \
  -e WORDPRESS_DB_NAME="wp" \
  -e WORDPRESS_DB_USER="wordpress" \
  -e WORDPRESS_DB_PASSWORD="w0rdpr3ss" \
  -e WORDPRESS_DB_HOST="pod_db" \
  --name=wordpress wordpress
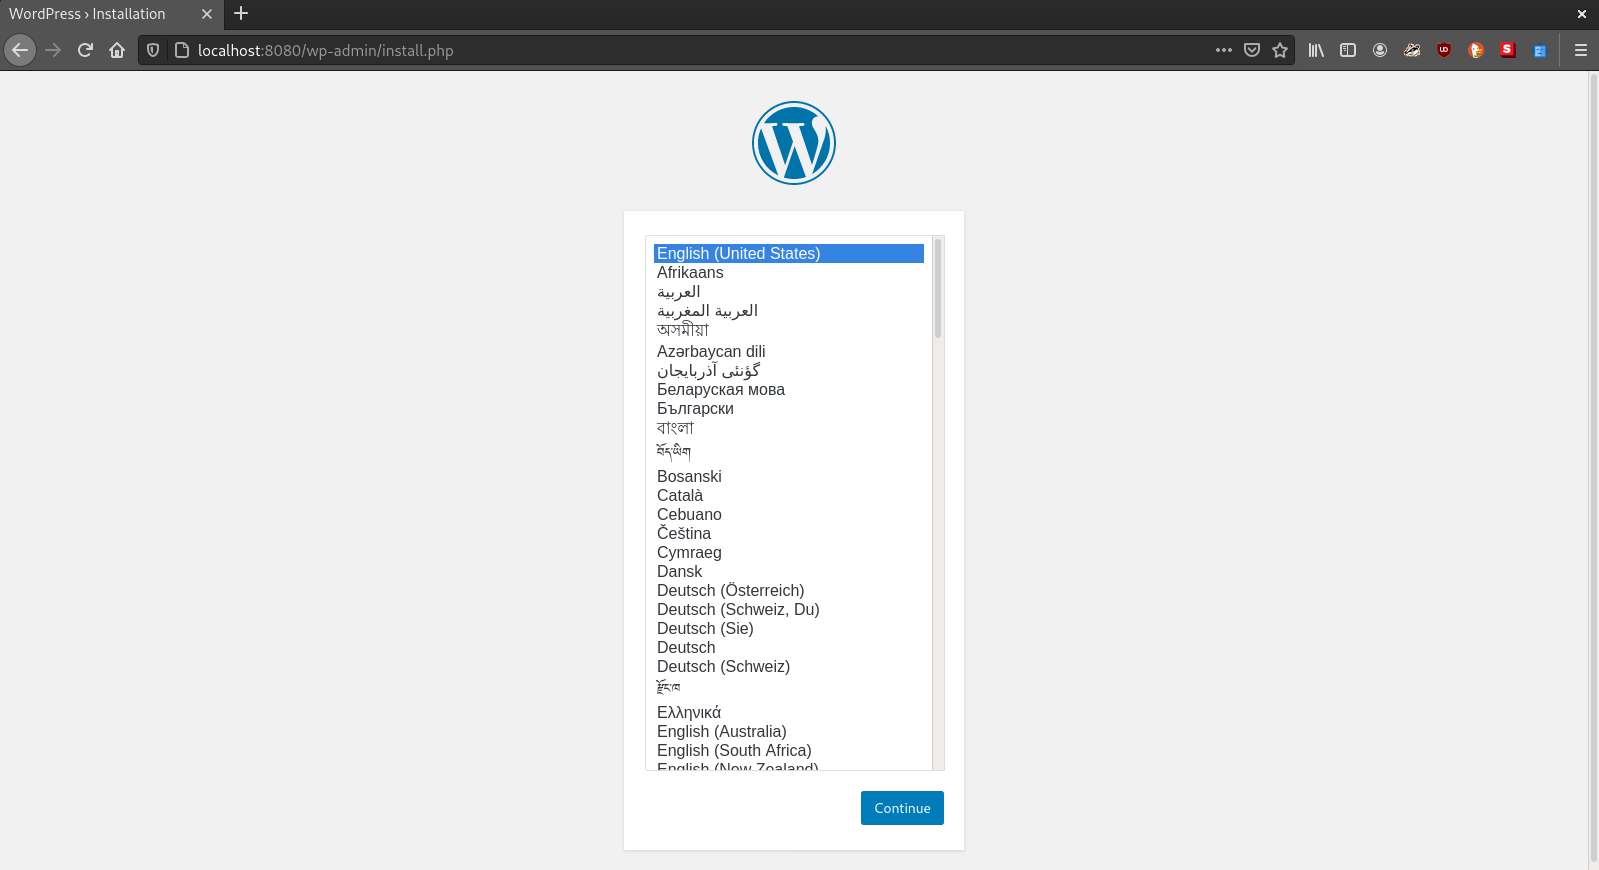
Now, check localhost:8080, and you might be able to see the application:
If you have any questions, feel free to send an email, and also check the Podman and dnsname projects.
Tags: 2020, tech, podman, containers, pod
Using the NGINX container as a reverse proxy
In this post, we will do the following:
- Generate a container stack (set of containers that will interact between themselves on their network) where a reverse proxy (in this case NGINX) will handle the traffic.
- Create self-signed certificates (This is an example. Please try to generate certificates signed by trusted certificate authorities like Let's Encrypt)
- Configure NGINX to:
- Listen on port 80 and 443
- Redirect traffic from port 80 to port 443
- Configure the listener on port 443 to use the generated certificates and handle traffic from outside to the JIRA container on port 8080`
Introduction
Recently I have been dealing a lot with the usage of containers to avoid writing huge scripts to deploy stuff that is not intended to run for a long time. For example, I was asked to deploy a test JIRA Core (specifying the Core part as now JIRA has three new modalities) because there were some changes in the API. I followed the guide from Atlassian, but honestly there were too many instructions to set up and the requester needed that server as soon as possible.
With containers, it is simply a task of installing your preferred container engine (See the famous Docker, RKT, cri-o, Podman and so on), grab an image from a registry online (famous cases are Dockerhub or Quay.io) or develop one yourself if you are up to the task, and run an instance of that image with the necessary settings. Also, there are orchestrators (Kubernetes, Docker Swarm, Apache Mesos, and so on) where you indicate a stack of containers you wish to deploy and they will handle the whole lifecycle and management of the stack. In my case, I go into that path if the application is intended to stay longer than usual (or permanently). If it is something quick, then I use Docker Compose as a stack testing tool or a stack intended to stay for a shorter period into a testing server.
In this specific case with the JIRA server, I got the compose specs from this repo ran into Docker Compose, checked the logs and then it was a matter of tuning the server (in the case of the cloud, finding the instance type that supported running this application without crashing, which should be one with more than 2Gb). But coming from a security team, well, the original stack was opening port 80, which although it works, it is not secure. Securing your application for public access must be done always. Here is where NGINX comes.
I won't bring you details about NGINX because I'm no specialist at it, but in summary, it can be used as a reverse proxy where it takes requests and forward them to servers that can be in internal networks. This is all we need here: On our stack network, we open ports 80/443 in favor of NGINX instead of JIRA, and we configure NGINX to forwad all requests to the JIRA container, which will be open on port 8080 as default (see the docker-compose file from the previous link).
As this guide won't fall into too many details (again, I'm not a specialist at NGINX), we will generate the following folder structure:
jira
|_docker-compose.yml  # Using the one from github.com/dockeratlteam/jira
|_nginx
  |_certs
    |_ca              # Certificate Authority
    |_jira            # Certificates for server
  |_config            # NGINX conf.d files
Generating self-signed SSL certificates
Again, this is an example. Please use trusted certificate authorities to sign your certificates. I decided to go that path so you can have an understanding on how to create them.
First, let's go to the nginx/certs/ca folder. We will first generate the Certificate Authorities, by first generating a key, then a certificate signing request (a request to the CA to obtain certificates), and finally the certificate:
openssl genrsa -out ca.key 2048                              # Generating a 2048-bit key
openssl req -new -key ca.key -subj "/CN=own-ca" -out ca.csr  # Generating Certificate Signing Request with key generated previously
openssl x509 -req -in ca.csr -signkey ca.key -out ca.crt     # Generating the certificate
Now, we are going to generate the certificates we want on our server, signed by the previously created CA. The commands are pretty much similar. Move to nginx/certs/jira (or ../jira):
openssl genrsa -out jira.key 2048
openssl req -new -key jira.key -subj "/CN=jira" -out jira.csr
openssl x509 -req -in jira.csr -CA ../ca/ca.crt -CAkey ../ca/ca.key -out jira.crt -CAcreateserial # Creating the certificate by specifying the CA keys
Setting up the NGINX listeners
Generally, the default configuration file for NGINX, located at /etc/nginx/conf.d/default.conf inside the container, has the following settings (I removed the comments from it as we don't need them):
server {
    # Listens on port 80 for server localhost
    listen       80;
    server_name  localhost;

    # Where the root path is located
    location / {
        root   /usr/share/nginx/html;
        index  index.html index.htm;
    }

    # How to deal with server errors
    error_page   500 502 503 504  /50x.html;
    location = /50x.html {
        root   /usr/share/nginx/html;
    }
}
Here, what we want to do is set up the following: - Setting up the listener at port 80 to redirect all traffic to port 443. This is to avoid anyone of entering port 80. - Setting up the listener at port 443, indicating the certificates to use and where to redirect our traffic
Go to nginx/config, create any file with the .conf suffix on its name (NGINX won't care about the name as long it has that suffix) and let's write the following:
# Proxying traffic from a certain server, in this case, the JIRA container
upstream jira {
  server jira:8080;   # On the docker-compose.yml, the JIRA container is named jira.
}

server {
  listen 80;
  # For any request, redirect to this URL
  return 301 https://$server_name$request_uri;
}

server {
  listen 443 ssl;
  ssl_certificate     /etc/ssl/jira.crt;
  ssl_certificate_key /etc/ssl/jira.key;

  location / {
    # NGINX will do the reverse proxy to the upstream jira settings specified above.
    proxy_pass "http://jira"
  }
}
Setting up the docker-compose file
Alright, now what we are going to do is the modify the JIRA container settings on that docker-compose file and add our NGINX container specs:
For the JIRA settings, remove (or comment) the port settings. They look like this:
services:
  jira:
  ...
    ports:
    - '80:8080'
  ...
A notice for this specific case is that you might need to add some settings to the JIRA container so it can work successfully with the reverse proxy. I won't post how as this is not the intention.
Now, add the nginx specs on the services list:
services:
...
  nginx:
    image: nginx:latest                  # Use another tag if stack is going to production
    restart: always                      # JIRA will take a while to load. This will help
    networks:
    - jiranet                            # Same network being used on jira and postgresql containers
    ports:
    - '80:80'
    - '443:443'
    volumes:
    - "./nginx/config/:/etc/nginx/conf.d/" # Mapping our conf file
    - "./nginx/certs/jira/:/etc/ssl/"    # Mapping our ssl certs
...
And now, we should be ready to run the docker-compose up command (if using an orchestrator, the recommended commands for it).
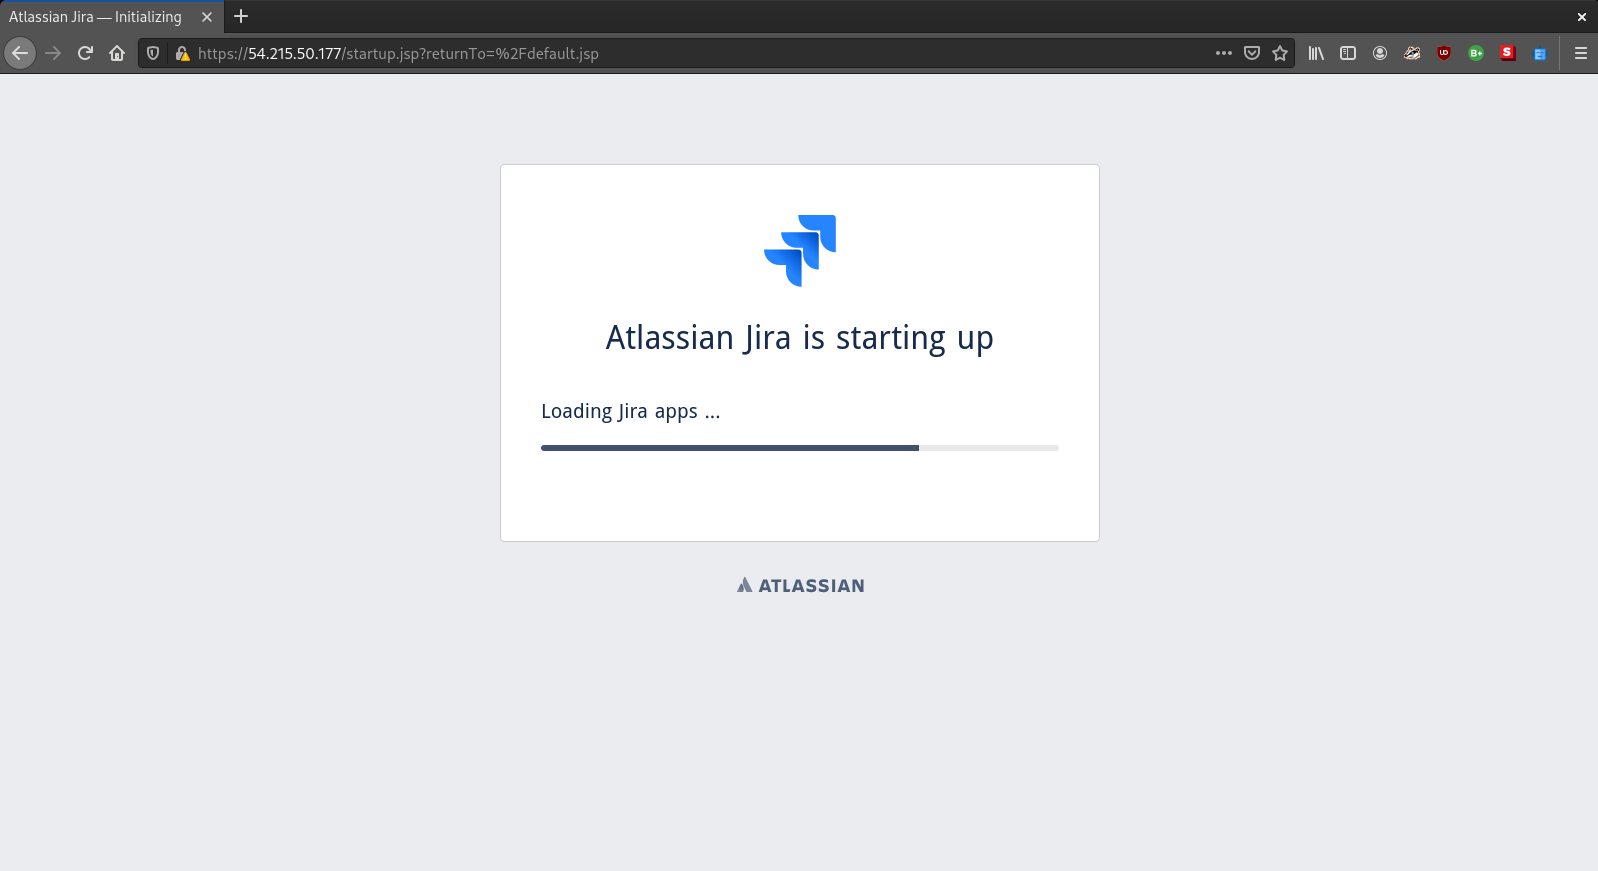
This is what we might see after a while when JIRA has set up the database:

Observations
- If you want to get deeper into customizing your NGINX container, one good place to look at NGINX settings is at
/etc/nginx/nginx.confinside the container. On the include part, it indicates that it will read files from/etc/nginx/conf.d/*.conf. You can create separate file for the listeners and you might get the same result, but in an ordered manner (like 80.conf and 443.conf). - Although we used Docker Compose for this, the container settings can be pretty much be used elsewhere as long the NGINX container is able to contact the JIRA container (or any other container) with the DNS name specified (in this case, jira) or IP (not recommended though as they might change when a container is destroyed). This means they should be on the same network.
Tags: 2020, tech, containers, nginx